How to label microSD cards?
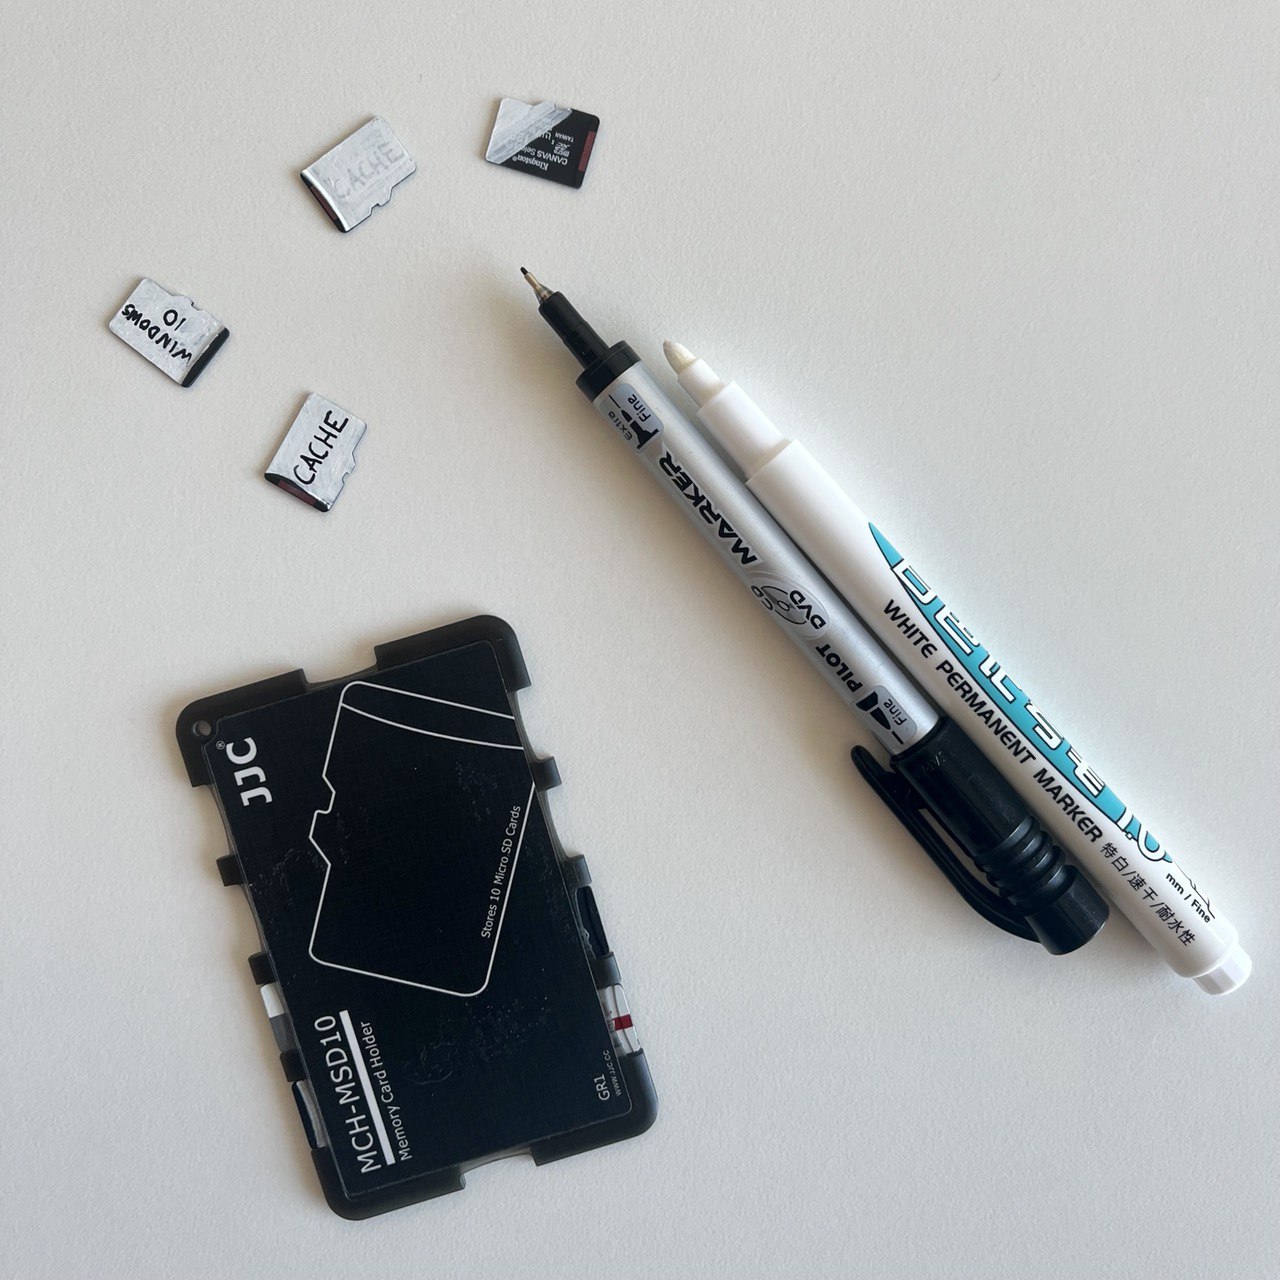
Let me give y'all another simple everyday advice! I've almost stopped using USB Drives because microSD cards are much more portable and convenient, especially if you have the right holder and right card reader. The only inconvenience is to distinguish them once you have many.
Recently I've discovered a perfect way to label microSD cards:
- Using white permanent marker paint one side
- Best results are if you let it dry for 30 seconds then repeat 2-3 times
- Using extra fine (0.5mm) black permanent marker label them
- If you ever need to change the label either:
- Repaint the new layer with a white marker (step 1)
- Remove all paint using alcohol pads
This approach was proven much better than correction liquid because it holds and does not crumble over time.
Some lesser known items good to have in your travel/emergency bag


I travel a lot. Like a lot lot. I’ve prepared an achievement list to define “a lot”:
- ✔ Visit more than 10 countries (I’m currently at 15)
- ✔ Spend at least 1/3 time abroad (in a years perspective)
- ✔ Fly without ticket back (round trip is for rookies)
- ✔ Buy plane tickets in the morning, fly in the afternoon
- ✔ Get weeks planned trip extended to a month
- ✔️Compelled to stay overnight because of a missed flight
- ✔️Get stranded at the airport for more than 12 hours
Because of that, I need to have my travel-survival bag always ready and with me. As unfortunate recent events taught more people to be more prepared for unforeseen travel, let me share some lesser known items that are good to always have in your bag.
What I'm trying to say, is items I about to recommend are carefully picked, tested and proven to be useful in a different life sutuations.
Read More →Simple way to get rid of code snippet spam (StackOverflow clones) in Google
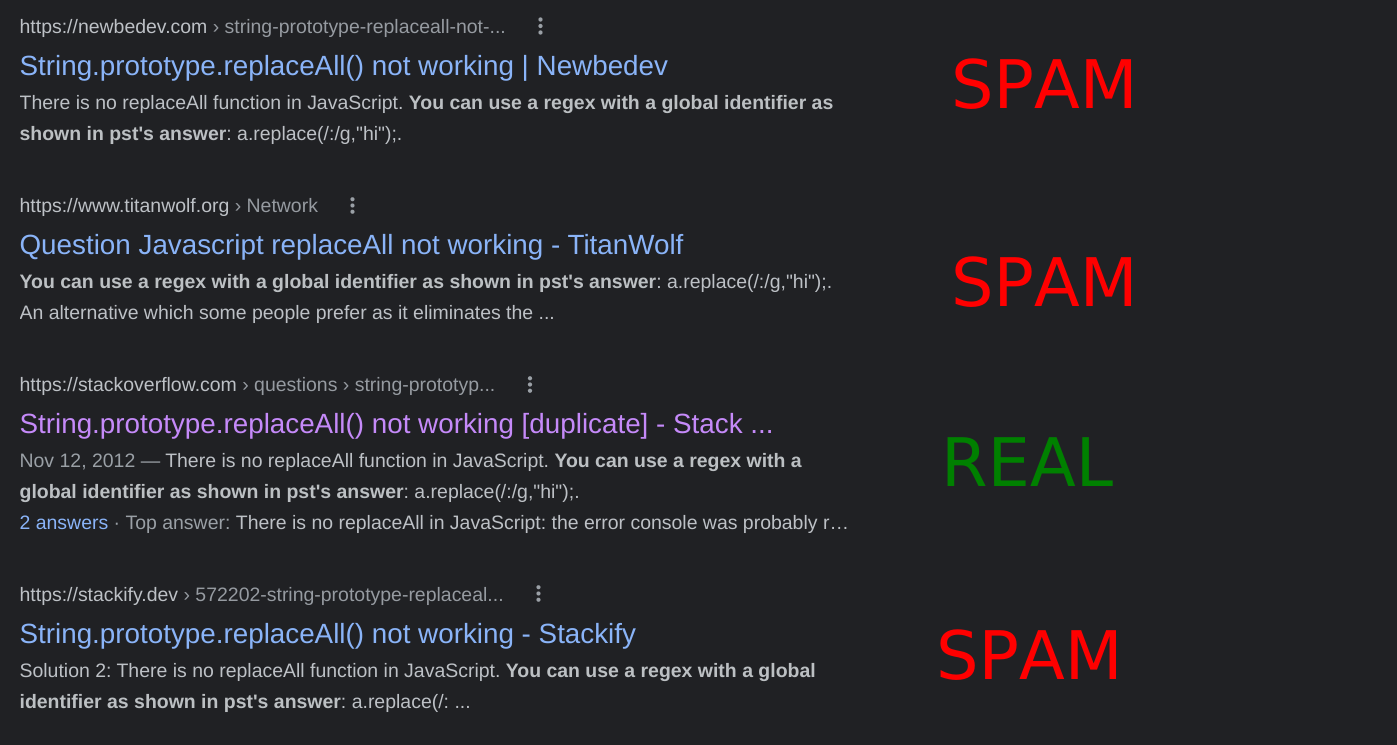
As if internet is not already full of bad advice about software development, there are always people who will find a way to make situation worse.
Solving programming problems, might be very time consuming, and to waste your time even more, there are many spam websites, that just rehash Stack Overflow/GitHub issues.
Seems that Google can't (or won't) do anything about it. Situation got so bad, that for some queries you get only spam results, Google is unable to find original.
You can easily found a dozen spam sites by searching any StackOverflow question in qoutes.
To save your time, you can use one of browser extensions that block certain sites from search results. But as I've mentioned previously, extensions are probably bad for you. Plus you need to configure and maintain the list.
As the simplest alternative, I suggest a block list (filter list). You probably already have a uBlock installed (or any other blocker compatible with AdBlock format). Or Vivaldi has built-in AdBlocker (Settings→Privacy→Tracker and ad blocking→Manage Sources->➕).
So, to get rid of search spam, subscribe to this list.
UPD exactly at the same time I wrote this post, another filter list was featured on Hacker News. So I'm not the only one who is bothered by this problem. Since it gained more attention, please use it.
UPD2 Neither Google or filter list are able to keep up with the problem. New spam sites keep popping up too quickly. Seems the only way to get rid of it is to use DuckDuckGo.
Tip: make JavaScript errors more apparent, then fix them
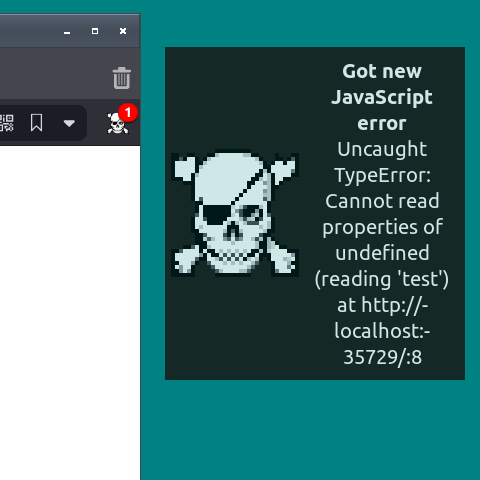
A long time ago, if a JavaScript error happened in the browser, a half-screen popup was shown to the user, asking if he wants to continue scripts execution on such a low-quality page. And user had the right to view the page without JavaScript at all, as most websites were functional without it. Tell this to modern frontend developers with their ubiquitous ‘undefined’ Is Not an Object.
Since then, JavaScript errors were hidden far away into developers console, because almost all modern websites are piling with it. The last time errors were visible somewhere in the interface was on FireBug button.
Of course, you are a better developer and can make things better in your own product. Technically you can always test your website with developers console open. But tiny icon in top-left corner is easy to miss.
A more convinient solution would be to install an extension that shows errors and notifications in a clearly apparent place. JavaScript Errors Notifier does exactly that.
If you are like me, and can not install extensions because of security reasons I can suggest a tiny, stripped-down alternative. The codebase is bare minimum and the extension runs only on localhost, to satisfy strict security requirements. The extension is intended to be installed from local disk.
Extension handles both handled and unhandled errors - so will work both with your regular pages and React.
Browser extensions are probably bad for you
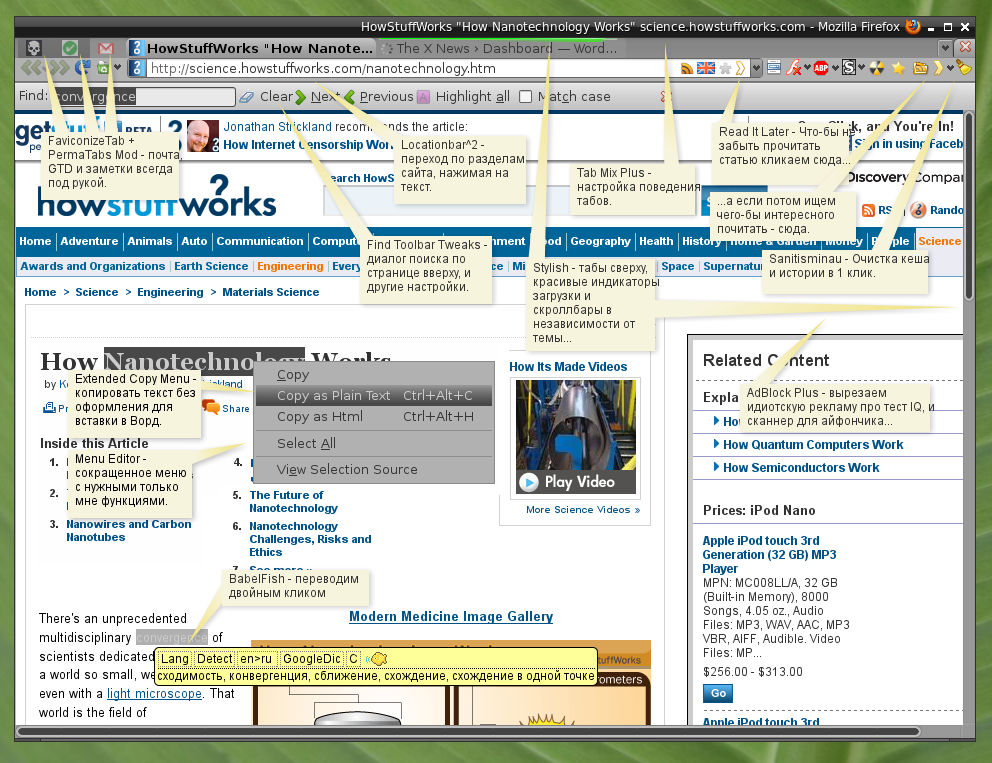
Want to share my controversial opinion about browser extensions, and how it changed over the years.
Just found my post written in old blog 2010 mentioning 22 extensions I was using daily in Firefox. Oh good old times, when extensions were so powerful!
When I've started this blog in 2016, I've recommended being careful about extensions, and review code before installing it.
Today I am strongly against installing extensions at all, because of the following reasons:
- It is too easy for an extension to get access to all your digital life, banking, and stuff. And then do bad stuff with it.
- Even if you trust the extension author, there is a chance that code will have a nasty vulnerability.
- Even if the extension author is good at programming, there is a chance that their account will be forgotten, abandoned, stolen, sold or hacked, and baddies will publish vulnerable code as an update.
Such stories happen too often, even with popular extensions.
Read More →USB Volume Control using Adafruit Rotary Trinkey

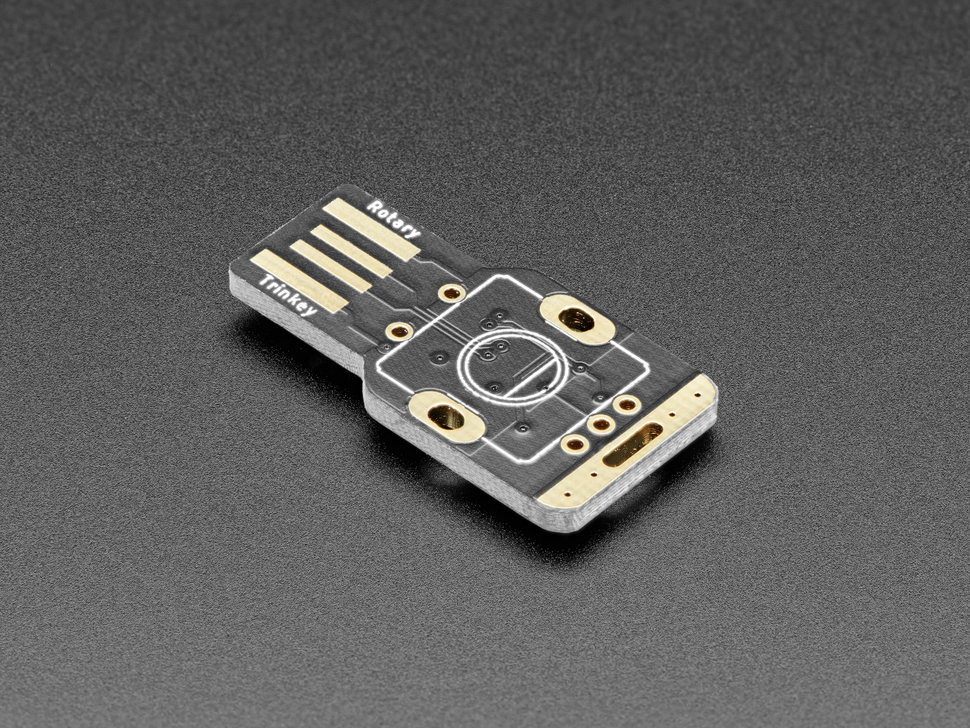
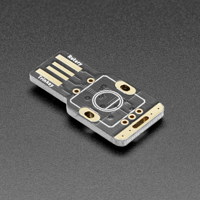
Adafruit Rotary Trinkey is a cool, 30-minute DIY build project. And having a nice tactile USB volume control knob on your table is very convenient.
Also, I dig Circuit Python development approach: the device is recognized as a USB drive. To program it, you just edit code.py file using any OS/editor. Changes applied immediately on save. Outputs on serial console. No development environment setup is needed! Nice, easy, and very refreshing.
- Just enough circuitry for volume control
- Computer sees device as HID. Simulates pressing keyboard media keys so compatible with any OS
- Also can simulate mouse, for example for a scroll wheel
- Play/pause on click
- Extra touch button (for example for next track)
- Fits in Airport Tick Tac box
- Multi color RGB LED which you can use for current volume indicator or system notifications
- Put in laptops USB port, USB hub, or using an extension cable to get gadget in convinient location
- Source Code using (Circuit) Python is short
- Requires tiny bit of soldering
Overall I had a lot of fun with this little gadget. Totally recommend!
Cable management tip: make them coiled

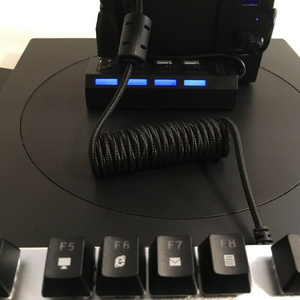
Every wired device comes with a 1-2m cable. Like why do I need a 2m cable for the mouse? It is not like pc located on a different floor. Laptop's USB port is 10cm from the mouse, and all modern displays have USB hubs1. And cable hanks are ugly. Usually, people address ugliness by replacing cables with Bluetooth/RF/Wi-Fi, but meh. Coil whine, interference with other devices, random disconnects, dead battery in the moment you need it the most... So much unnecessary problems. I'm old, and I like my computer peripherals to have wires2 of reasonable length. Previously I've even resoldered some USB cables to make them shorter.
Recently I found an ultimate solution from The Mechanical Keyboards community - DIY coiling cables. It is not necessary for detachable cable aesthetics, the method works on all peripherals, even with a cable attached. Each coil shortens the wire section π times! And by leaving part of the cable uncoiled you can get the exact length you need. And it looks neat. Requirements: a hairdryer, stick, and 10 minutes. Genius! Check the tutorial on YouTube.

Comments are on HACKADAY
CyberBadge activated!
Sometimes I look at the ordinary things and just see Raspberry Pi inside. Of course, in real life, there is no Pi inside, so I need to build it in there myself. Recently I found a minimalist wallet (or badge) and transformed it into an eInk CyberBadge!


To me, the wallet looked like a perfect sci-fi themed frame for an eInk display. Resulting in some kind of smart badge.
Read More →OpenWRT vs DD-WRT vs Tomato in 2021

UPDATE 2026: GL.iNet routers now ship with OpenWRT! So skip reading my whining and just get yourself one.
Disclaimer: this post is full of sadness, and contains a very subjective opinion
The router is a crucial part of your infrastructure. And there are two things wrong with modern routers. First routers are rarely getting security updates because manufacturers are busier with releasing new products than supporting old ones. So if you have an older router you are at risk of becoming of part of a botnet or your data stolen. Or in other cases, manufacturers themselves can sell your data for their benefit. And I'm speaking about trusted brands, not even about shady ones.
The obvious solution would be installing some open source firmware. The most known ones are Tomato, DD-WRT, and OpenWrt.
Read More →Low Power eInk Weather Gadget
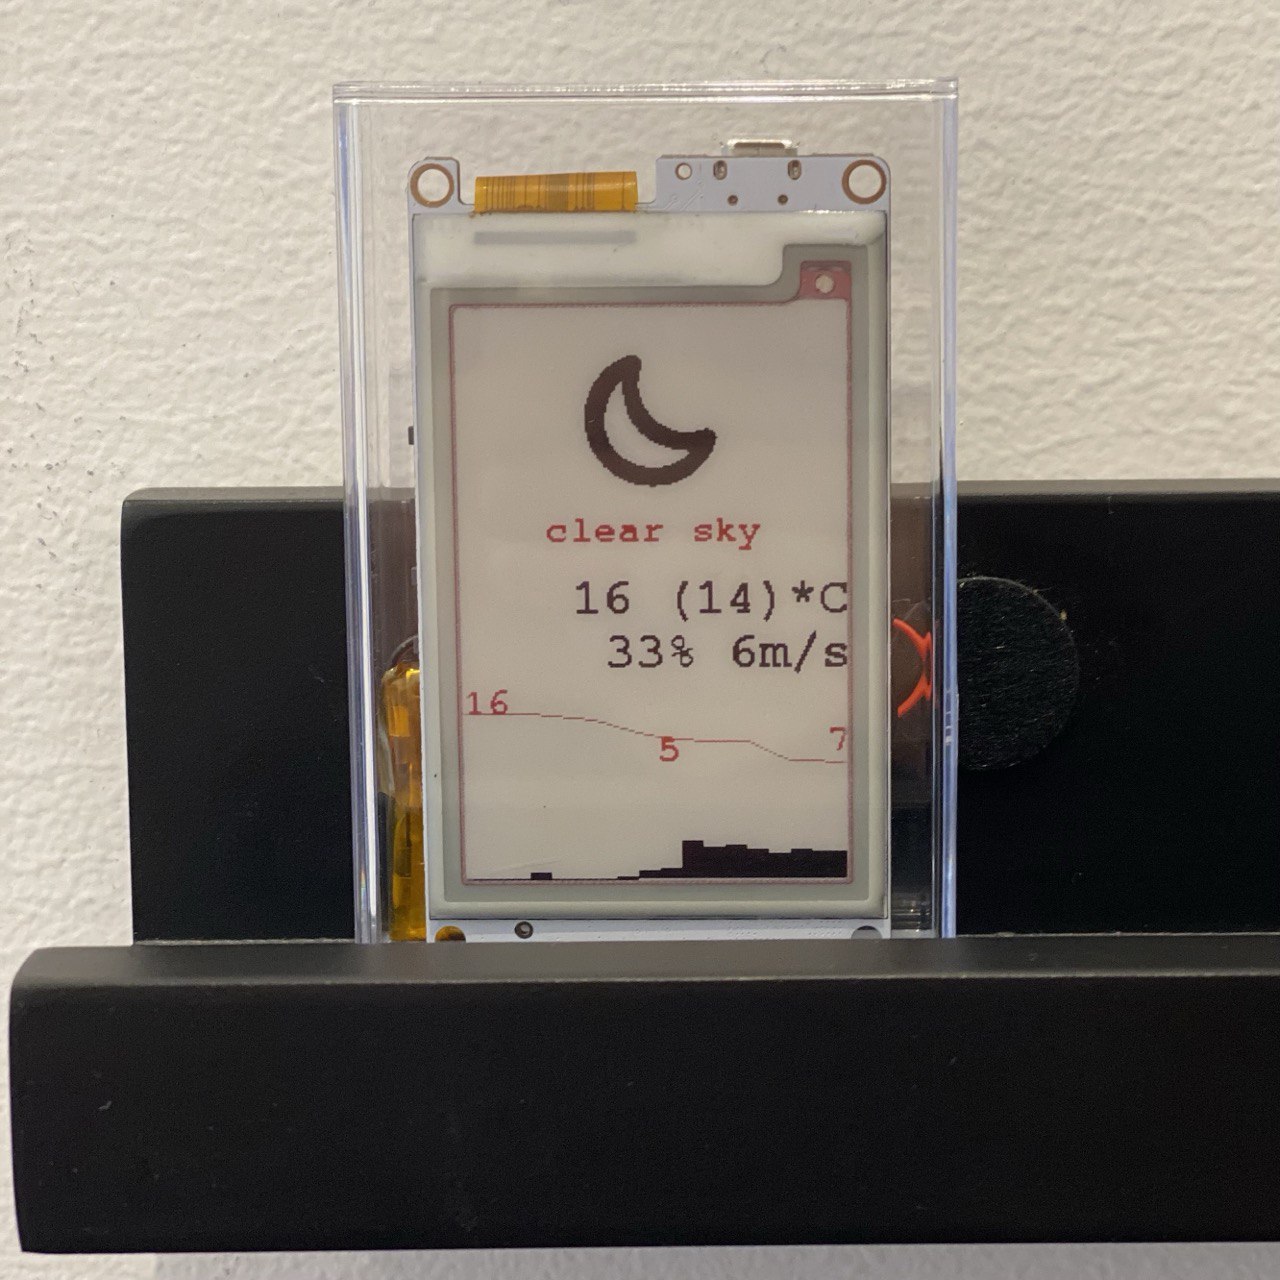
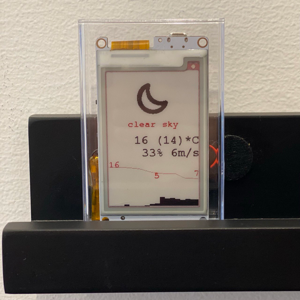
Taking a glance at the weather when leaving your cozy bunker is a very useful thing. It allows you to prepare for the ever-changing conditions and select protective gear according to the situation. You definitely need one!
To achieve that, of course, you can use your portable computing device (aka smartphone). But trust me, it is much more convenient when a nifty screen describing current and predicted weather condition resides on a shelf near the exit airlock. And it much simpler to build one then you might think.
As information is rarely updated, the natural choice for display is e-ink technology. A lot of engineers are using Raspberry Pi to drive it. But even Pi Zero is too much overhead for the simple task of downloading JSON file and presenting it on the screen (and I'm not even speaking about bringing node.js to the equation). It is like using a sixteen wheeler for door-to-door pizza delivery.
Much more suitable for the job is ESP32 system-on-a-chip. Recently I've discovered awesome boards from LilyGO. It has an 2.7" black/white/red e-ink display and wifi/bluetooth. Boards are programmable from Arduino IDE without shady software. Could be powered from literary everything: power bank, battery salvaged from your old mp3 player, LIR2450 coin cell battery... As it refreshes once in an hour you will get months of runtime - so combined with wifi - no wires on your shelf. Also, it has an sd card reader, 4 programmable buttons and pins for the speaker and microphone, in case you want some extra functionality.
Read More →© 20xx
Hosted on Cloudflare Pages, which is awesome!


